New in MC Earth Maps 1.0.6 · Windows & Linux workers
Choose the mountain height that fits your world.
Start with Balanced for familiar terrain. Choose Taller mountains for stronger relief, or Manual to set your own values. Hover, focus or tap the [i] beside a setting for help.
- Scale: metres per horizontal block. A smaller denominator makes a larger world.
- Mountain height: vertical exaggeration above sea level. Increasing it makes mountains taller.
- Ocean divisor: increasing it makes ocean floors shallower without flattening mountains. Automatic modes fit these values together.
The floor stays fixed: Y −64 through 319 for Minecraft 1.18+, or Y 0 through 255 for 1.17. Regional fitting looks at the whole selected area once—not each batch. Taller mountains increases regional relief by at most twice the normal preset, subject to available height. Editing either factor selects Manual.
Everest, measured in eight generated worlds
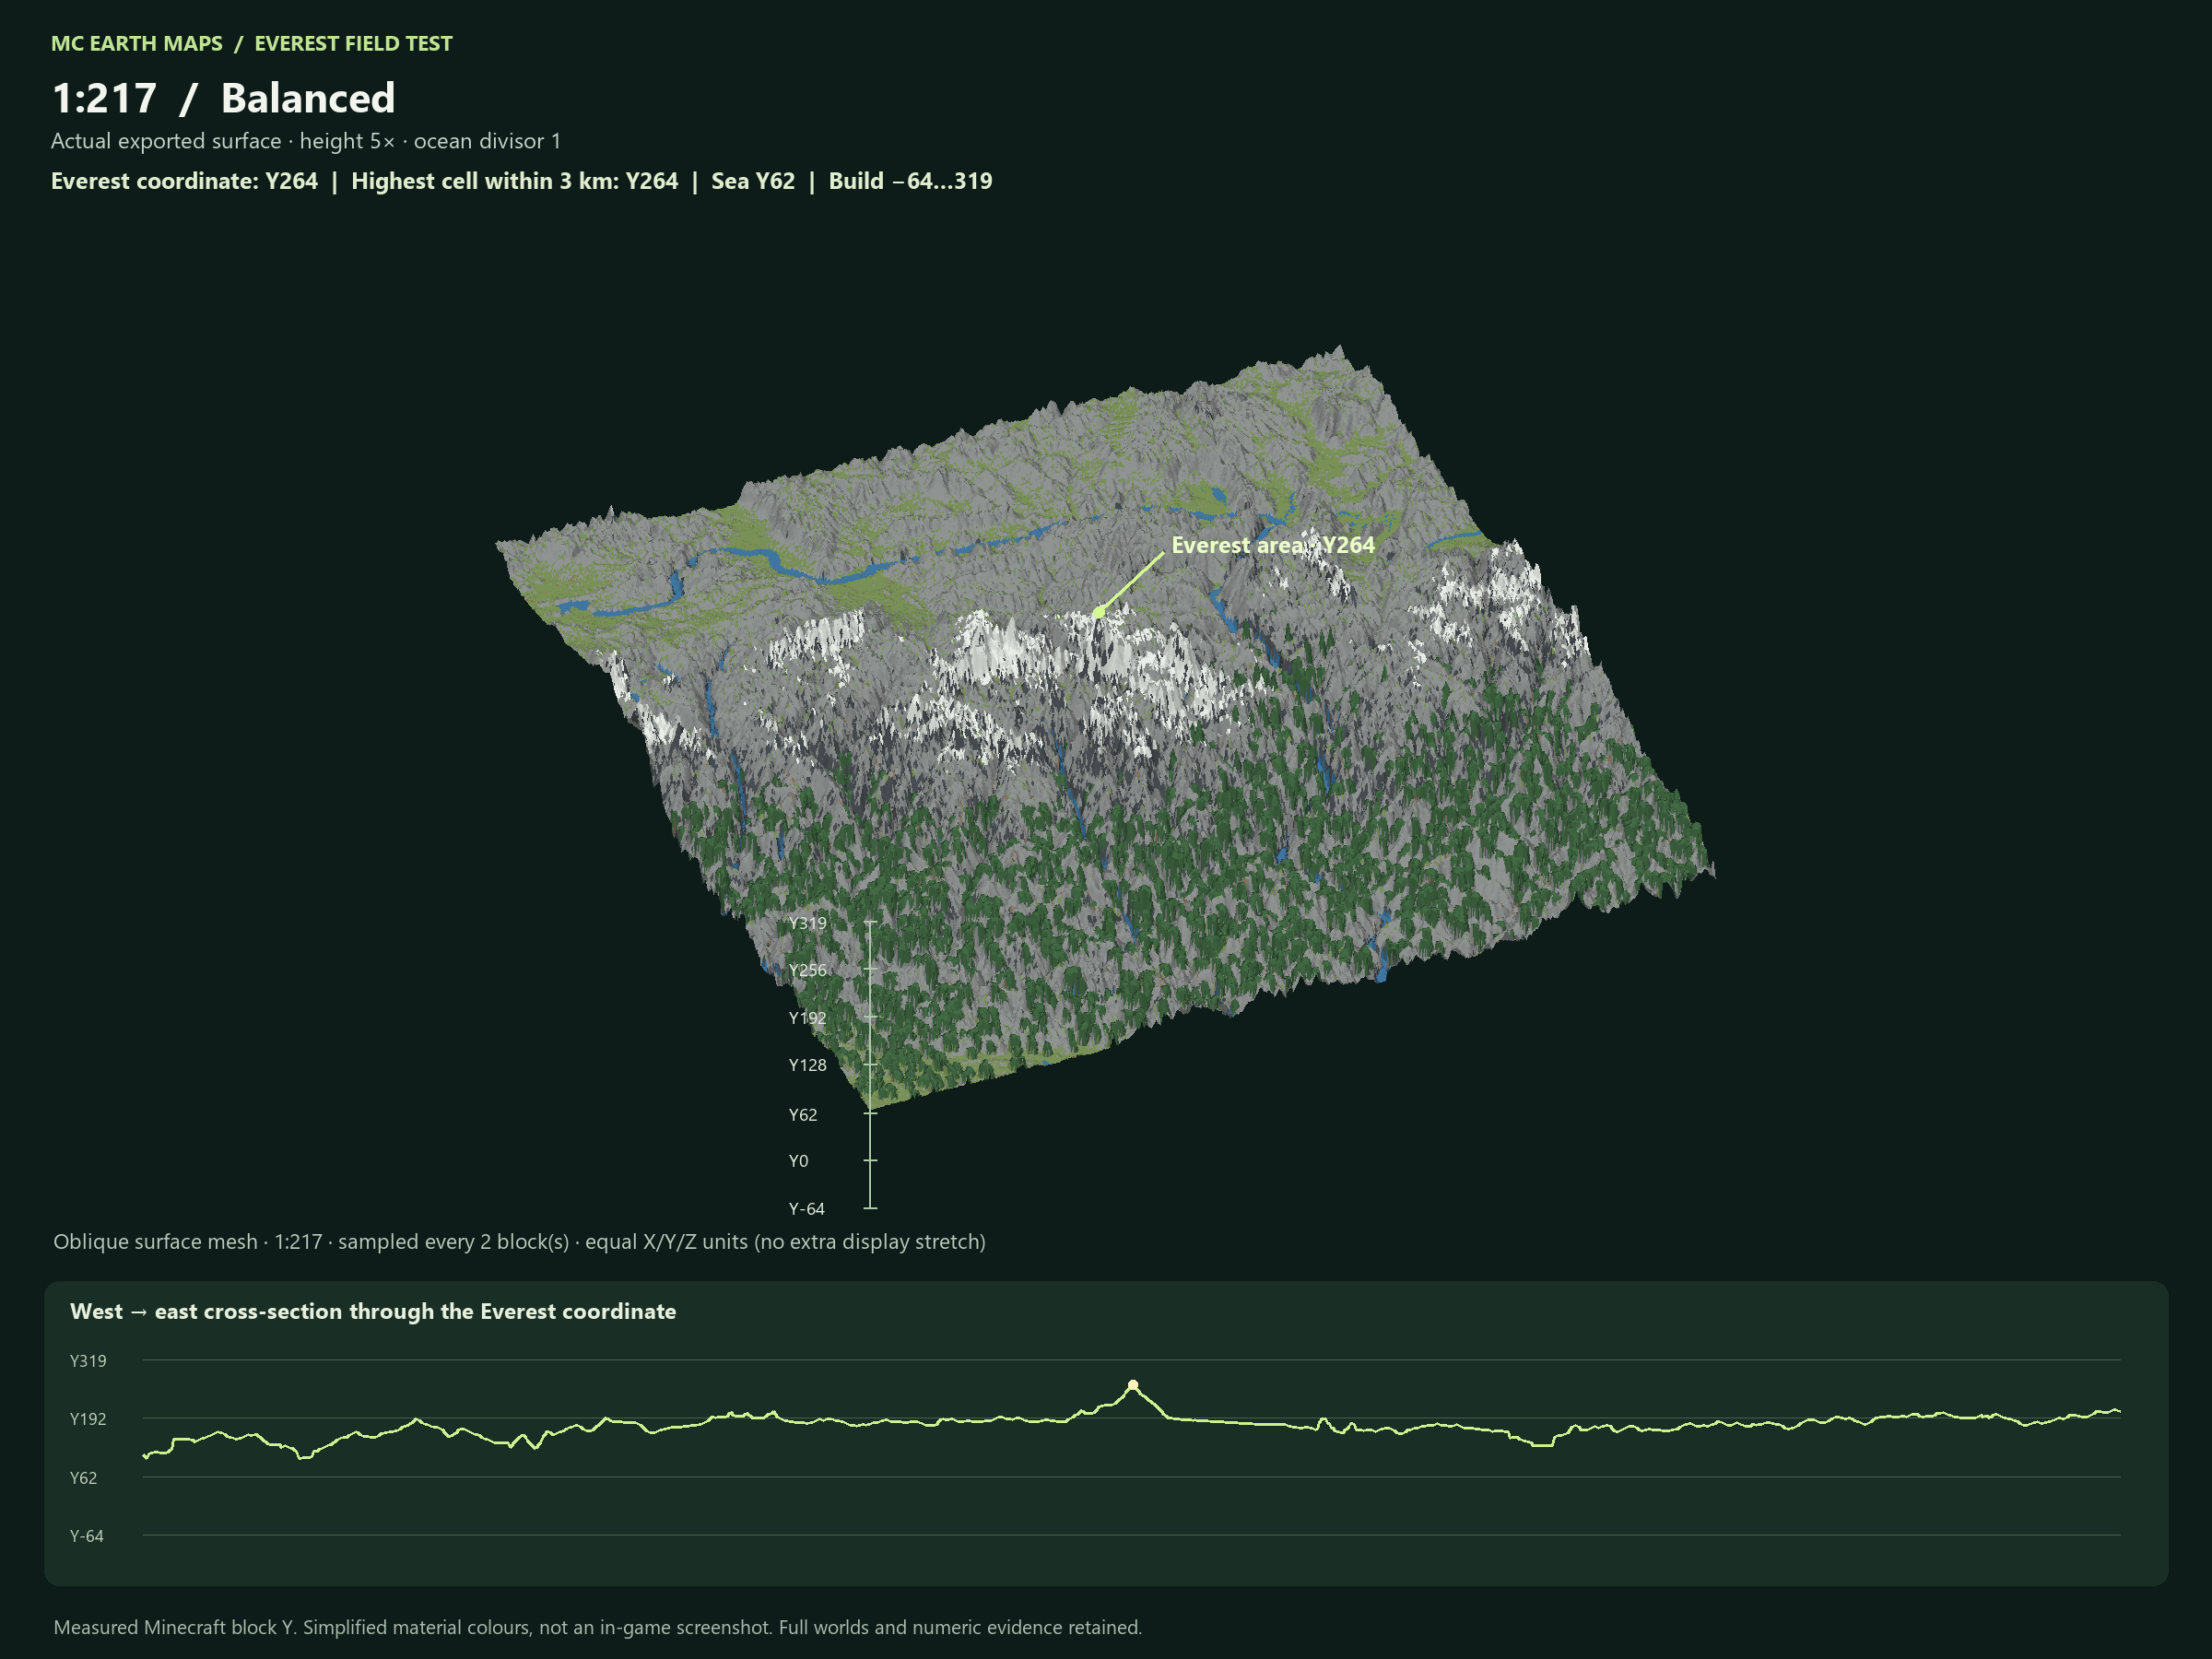
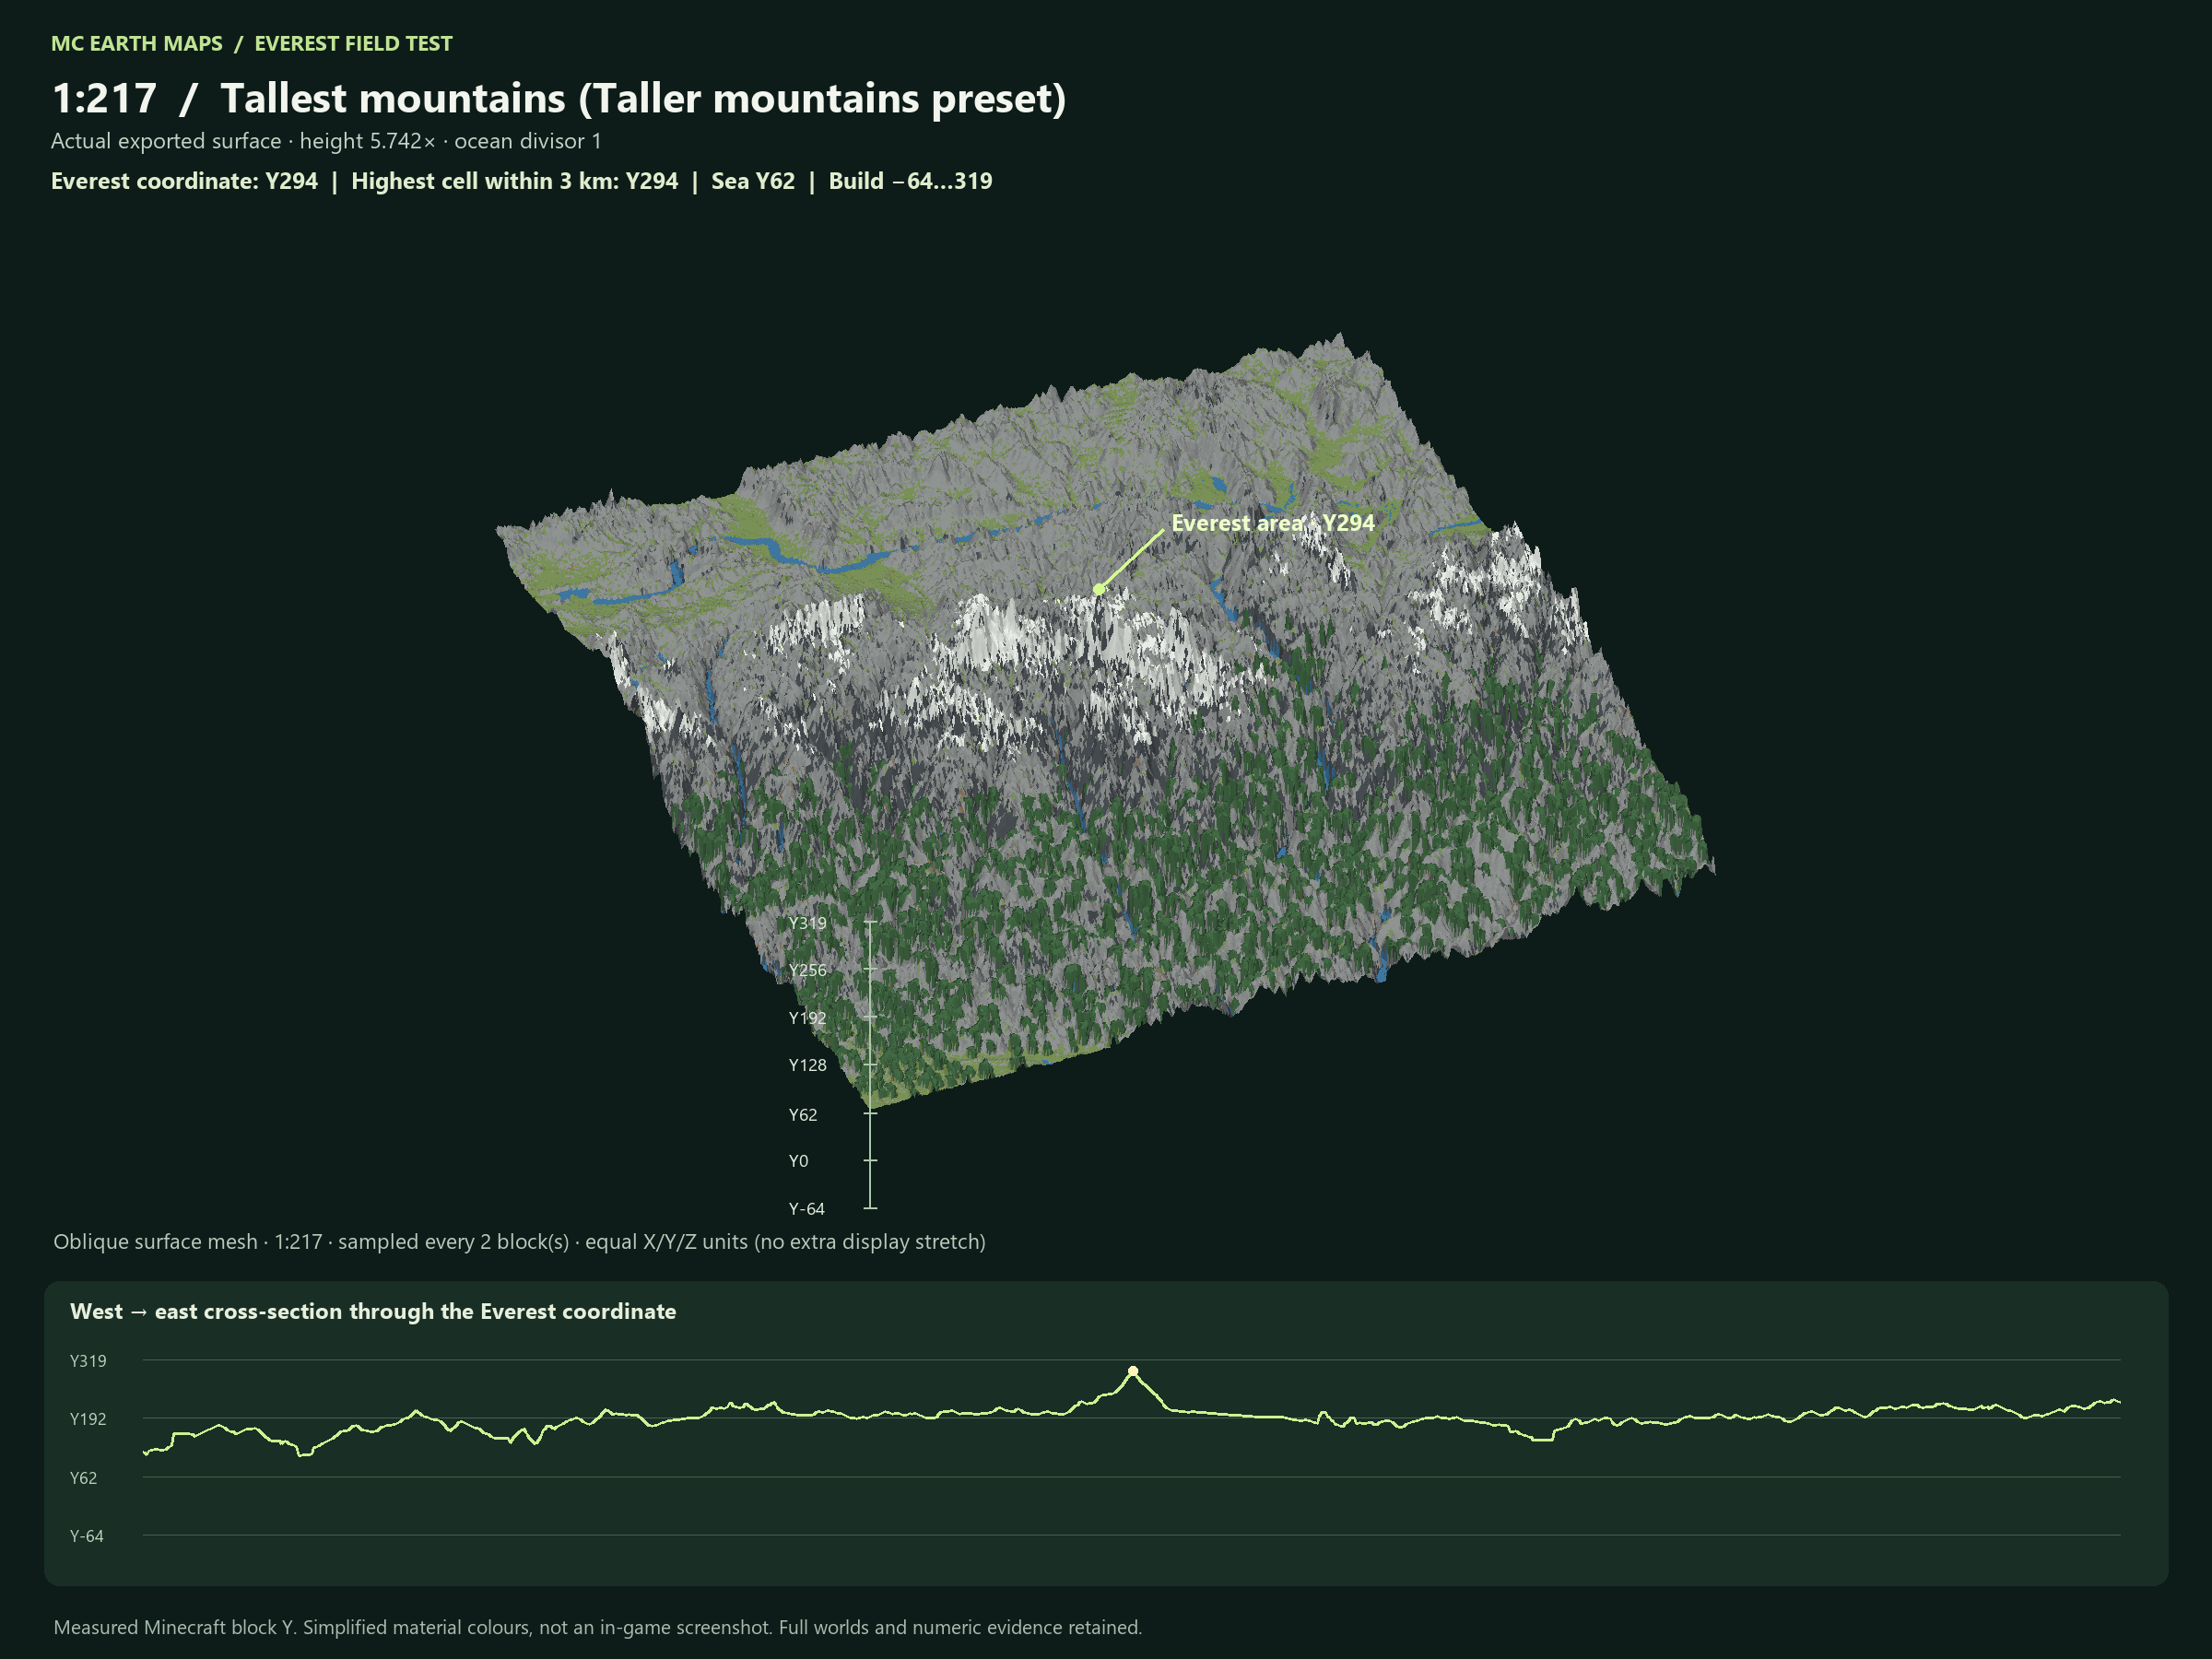
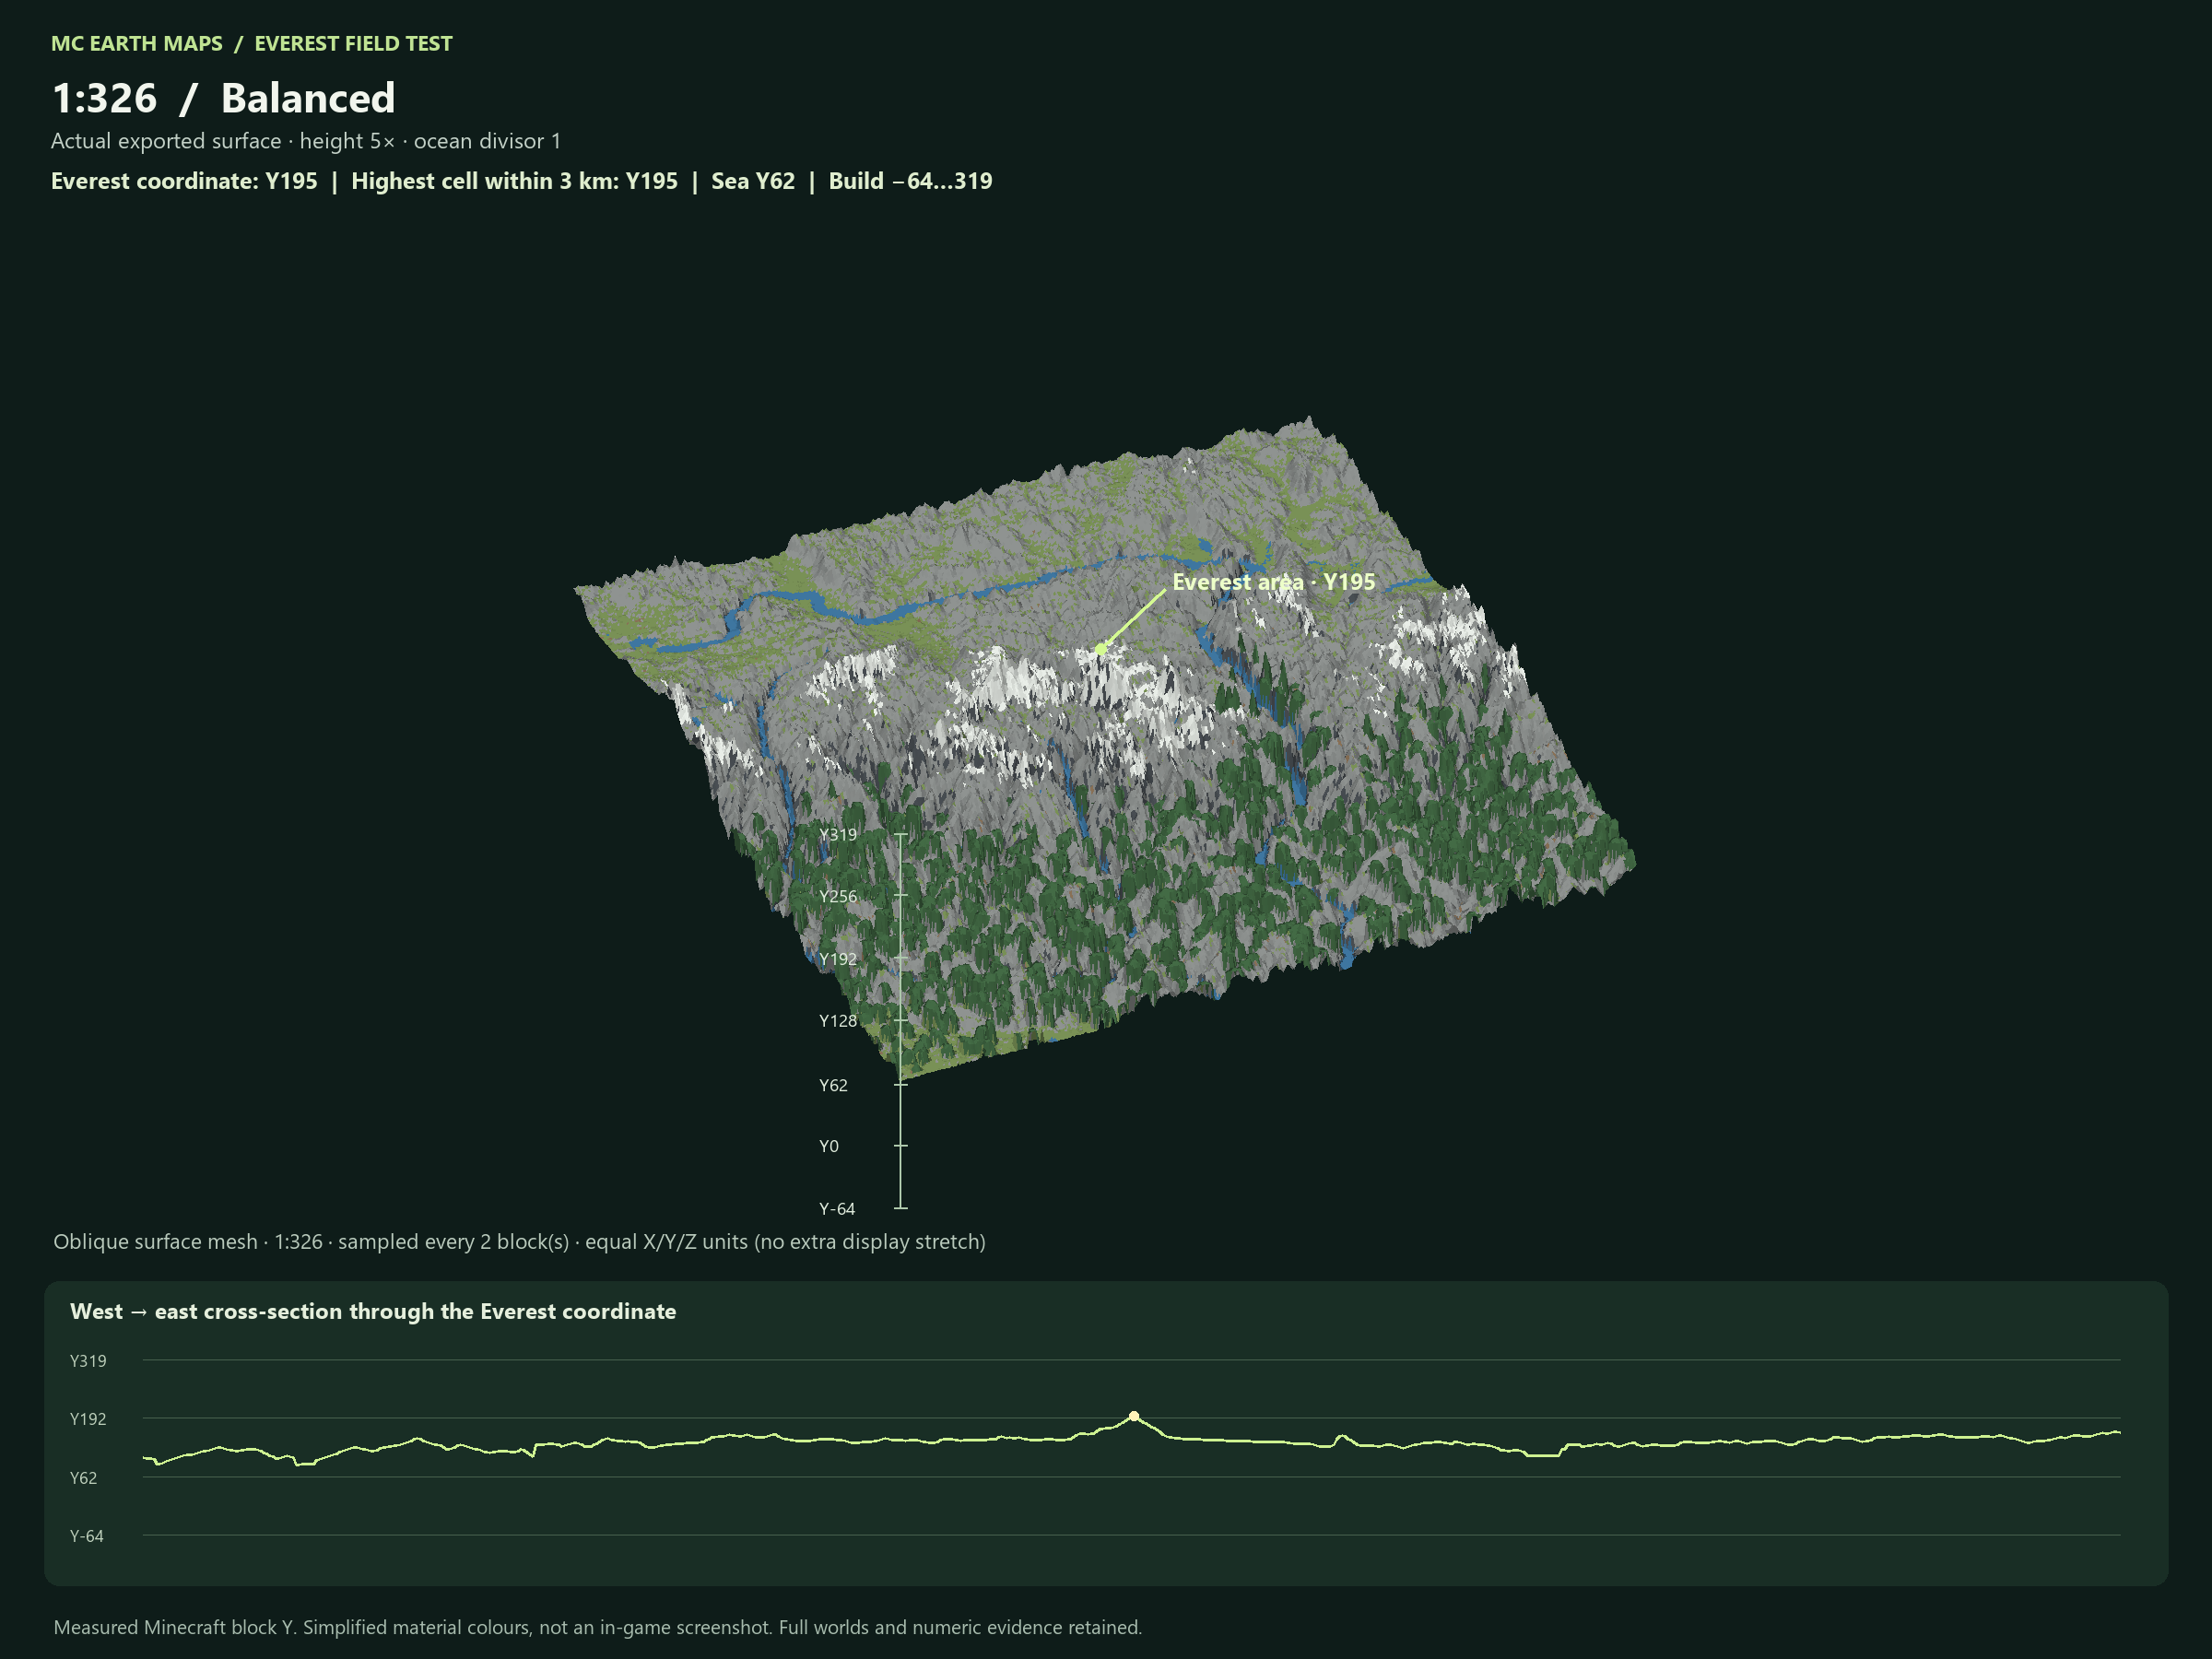
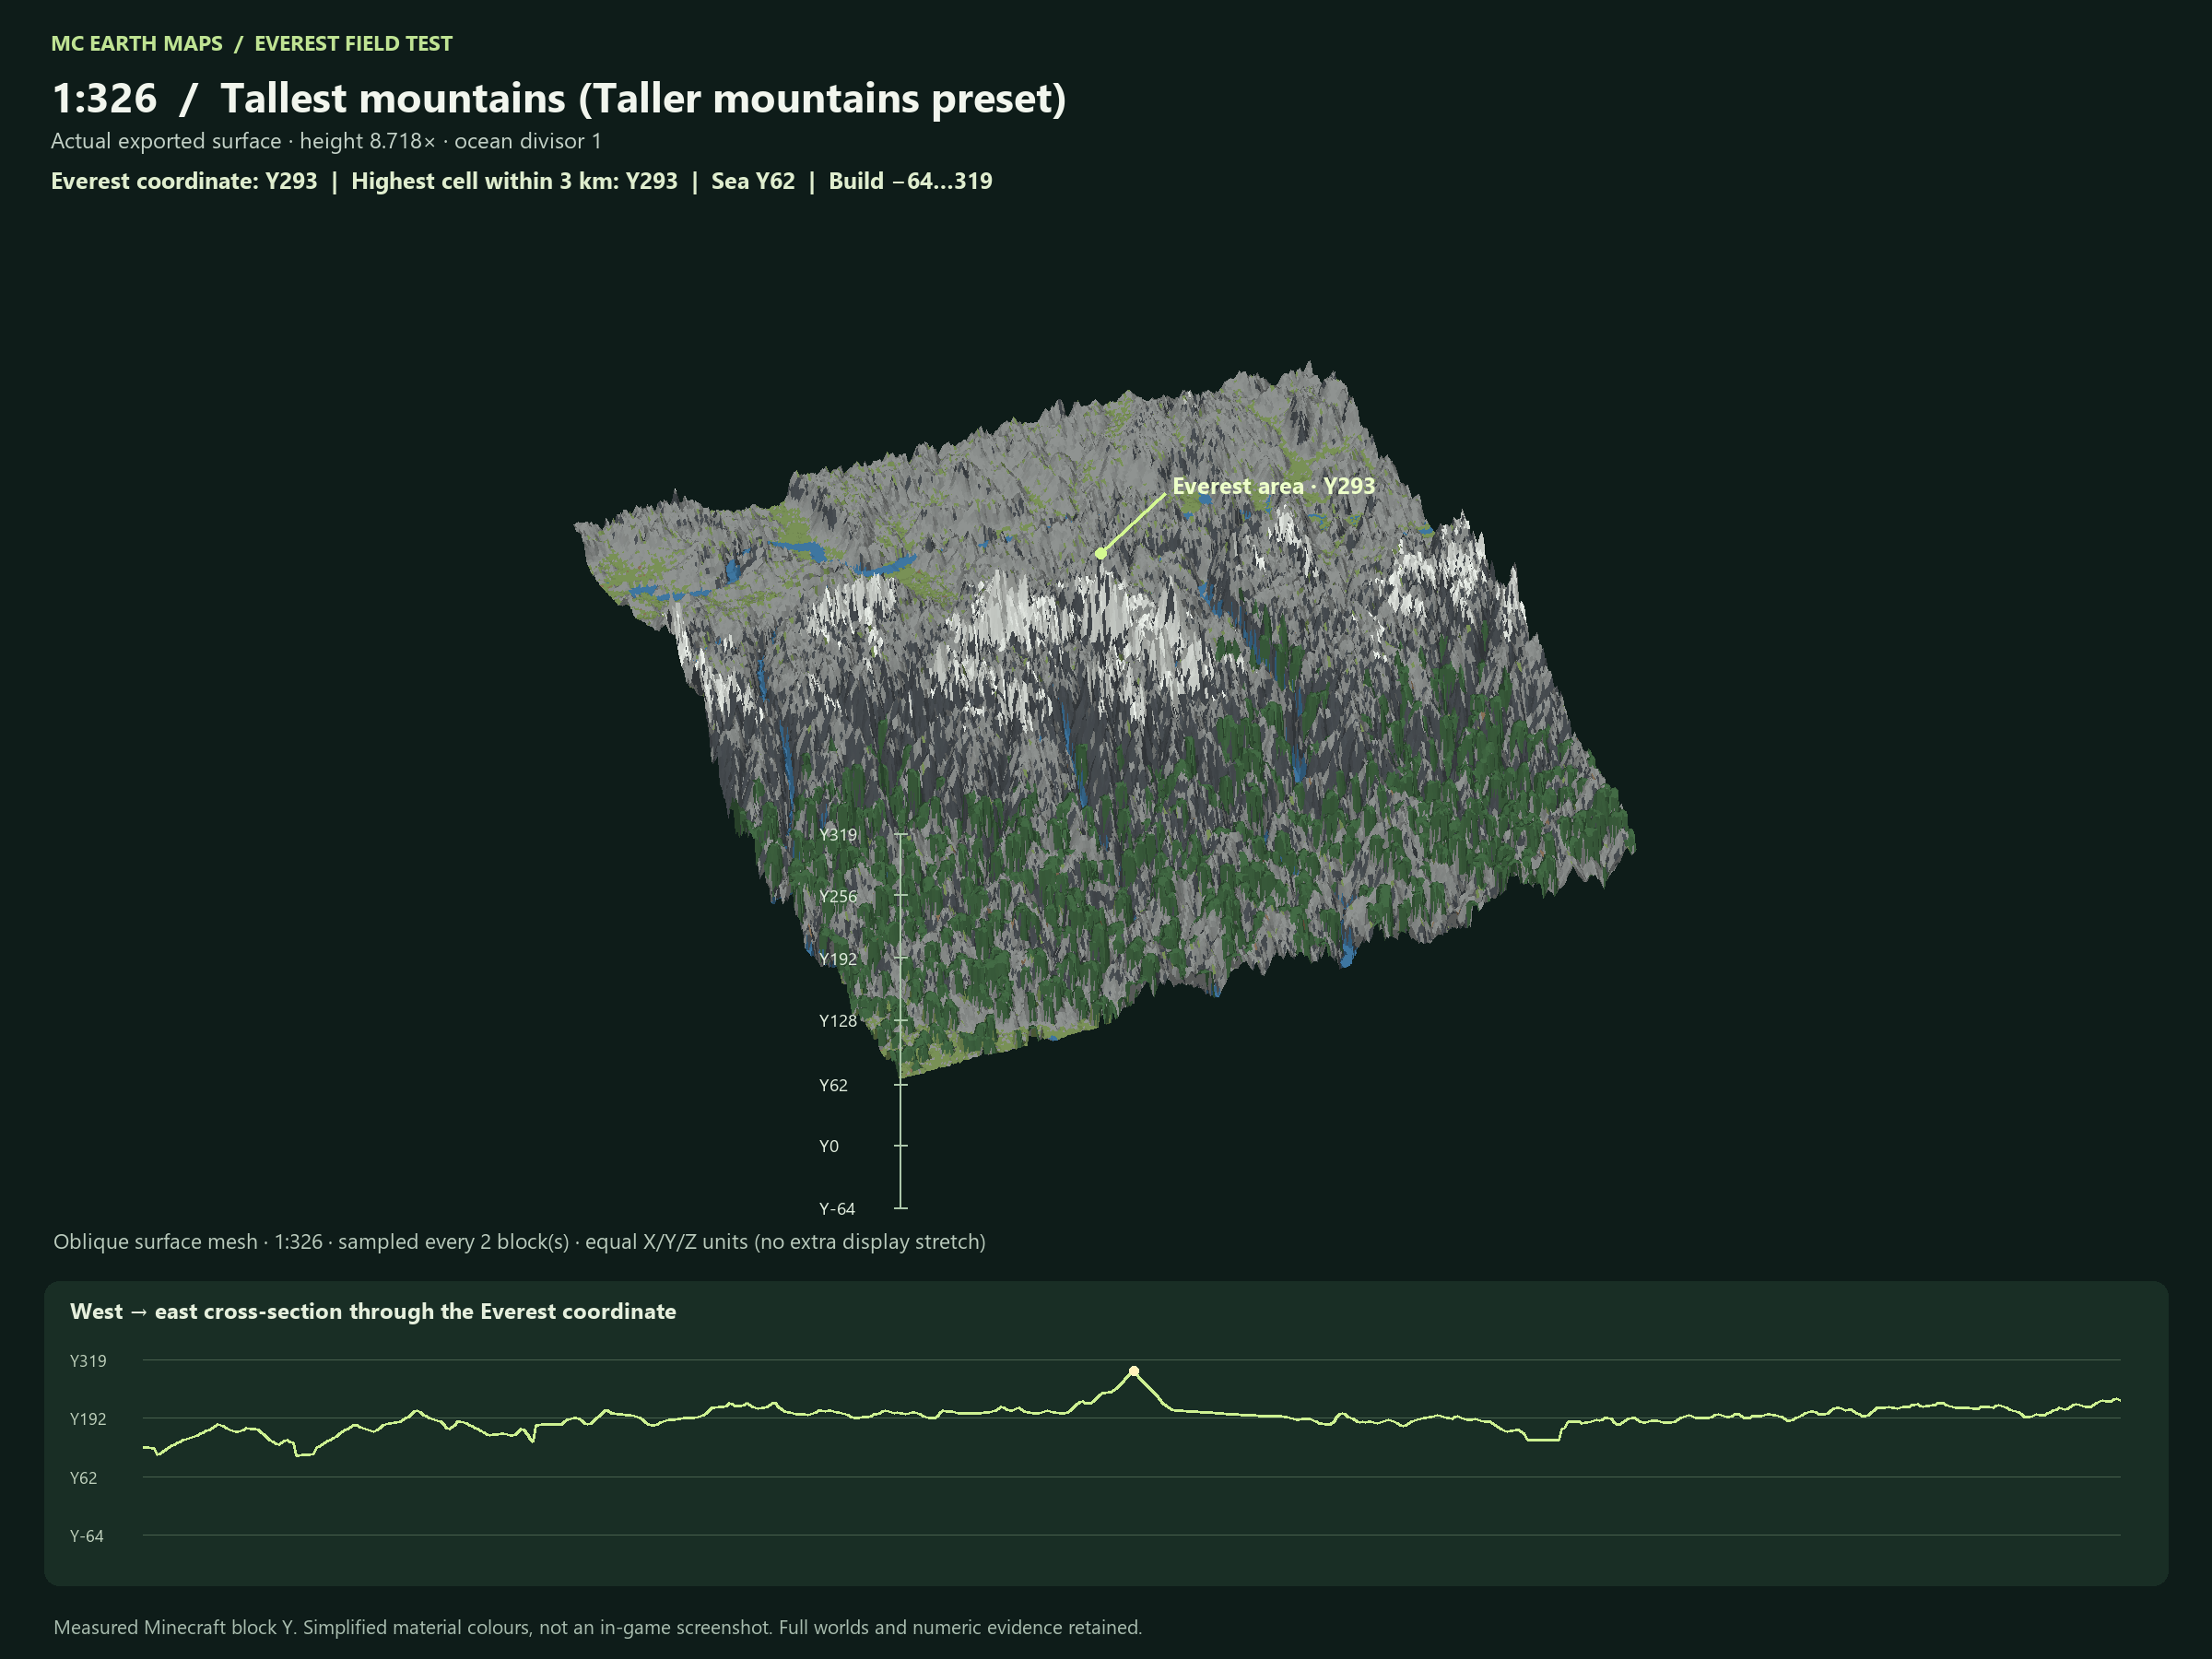
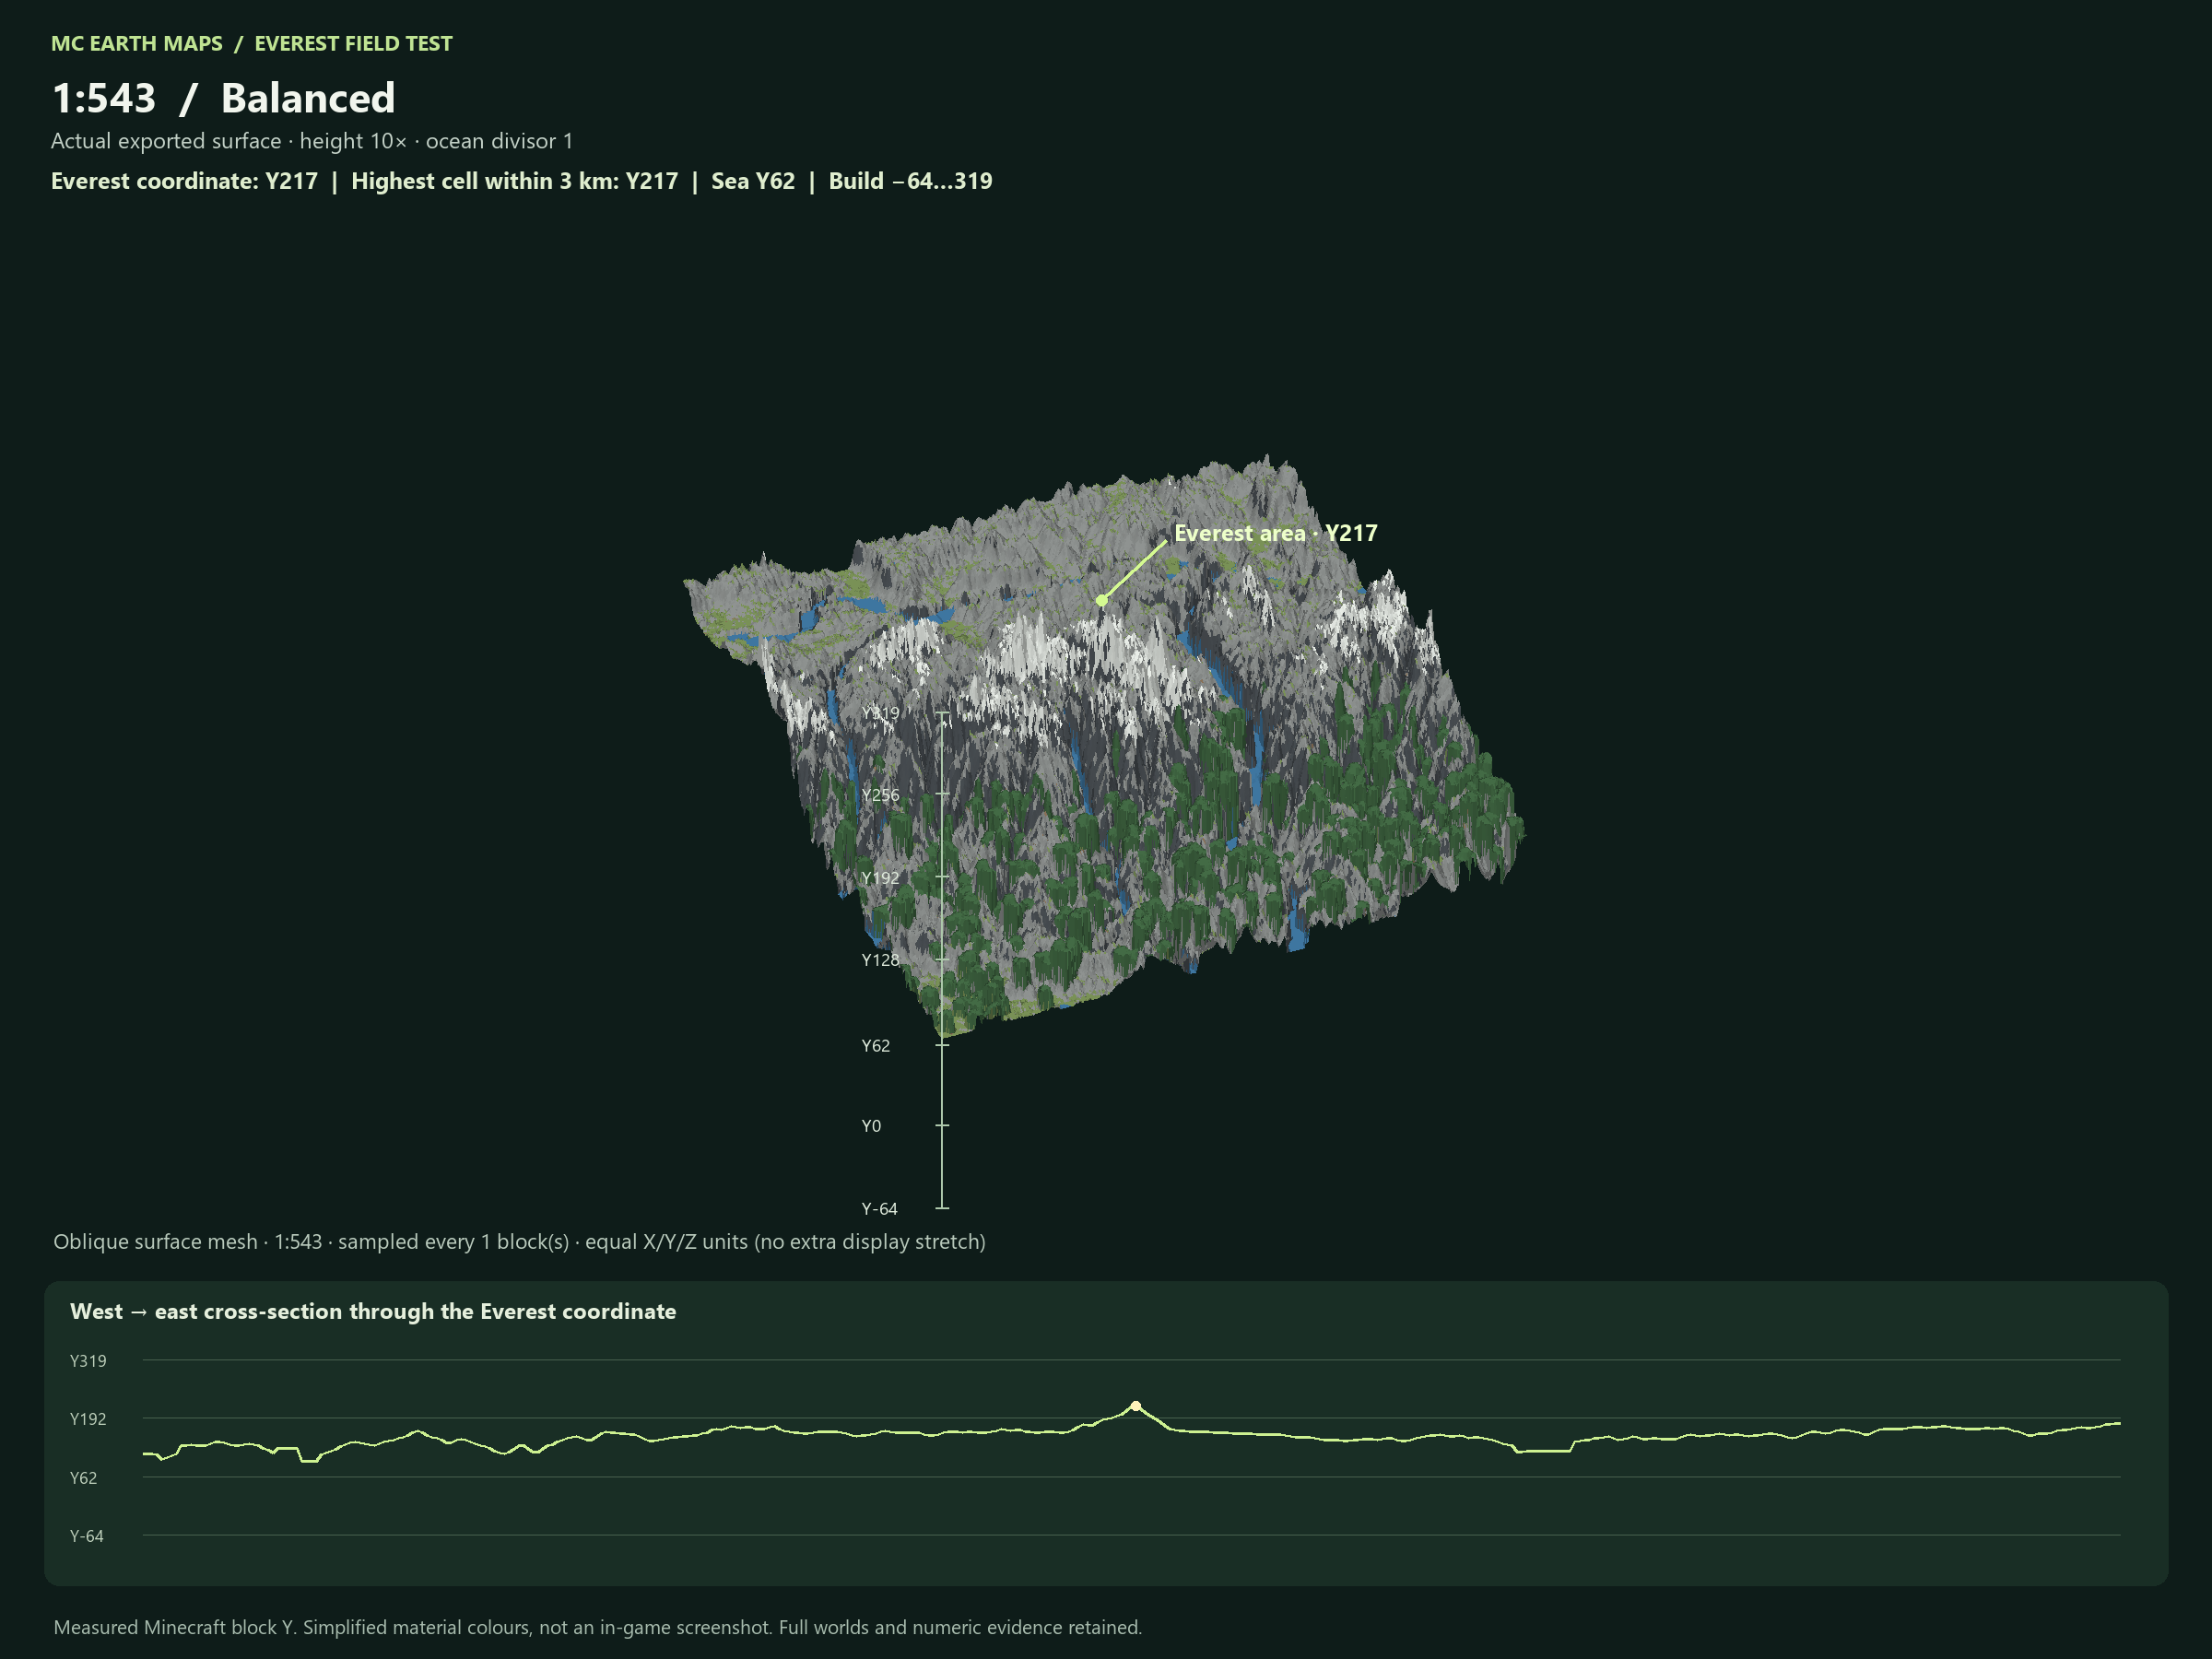
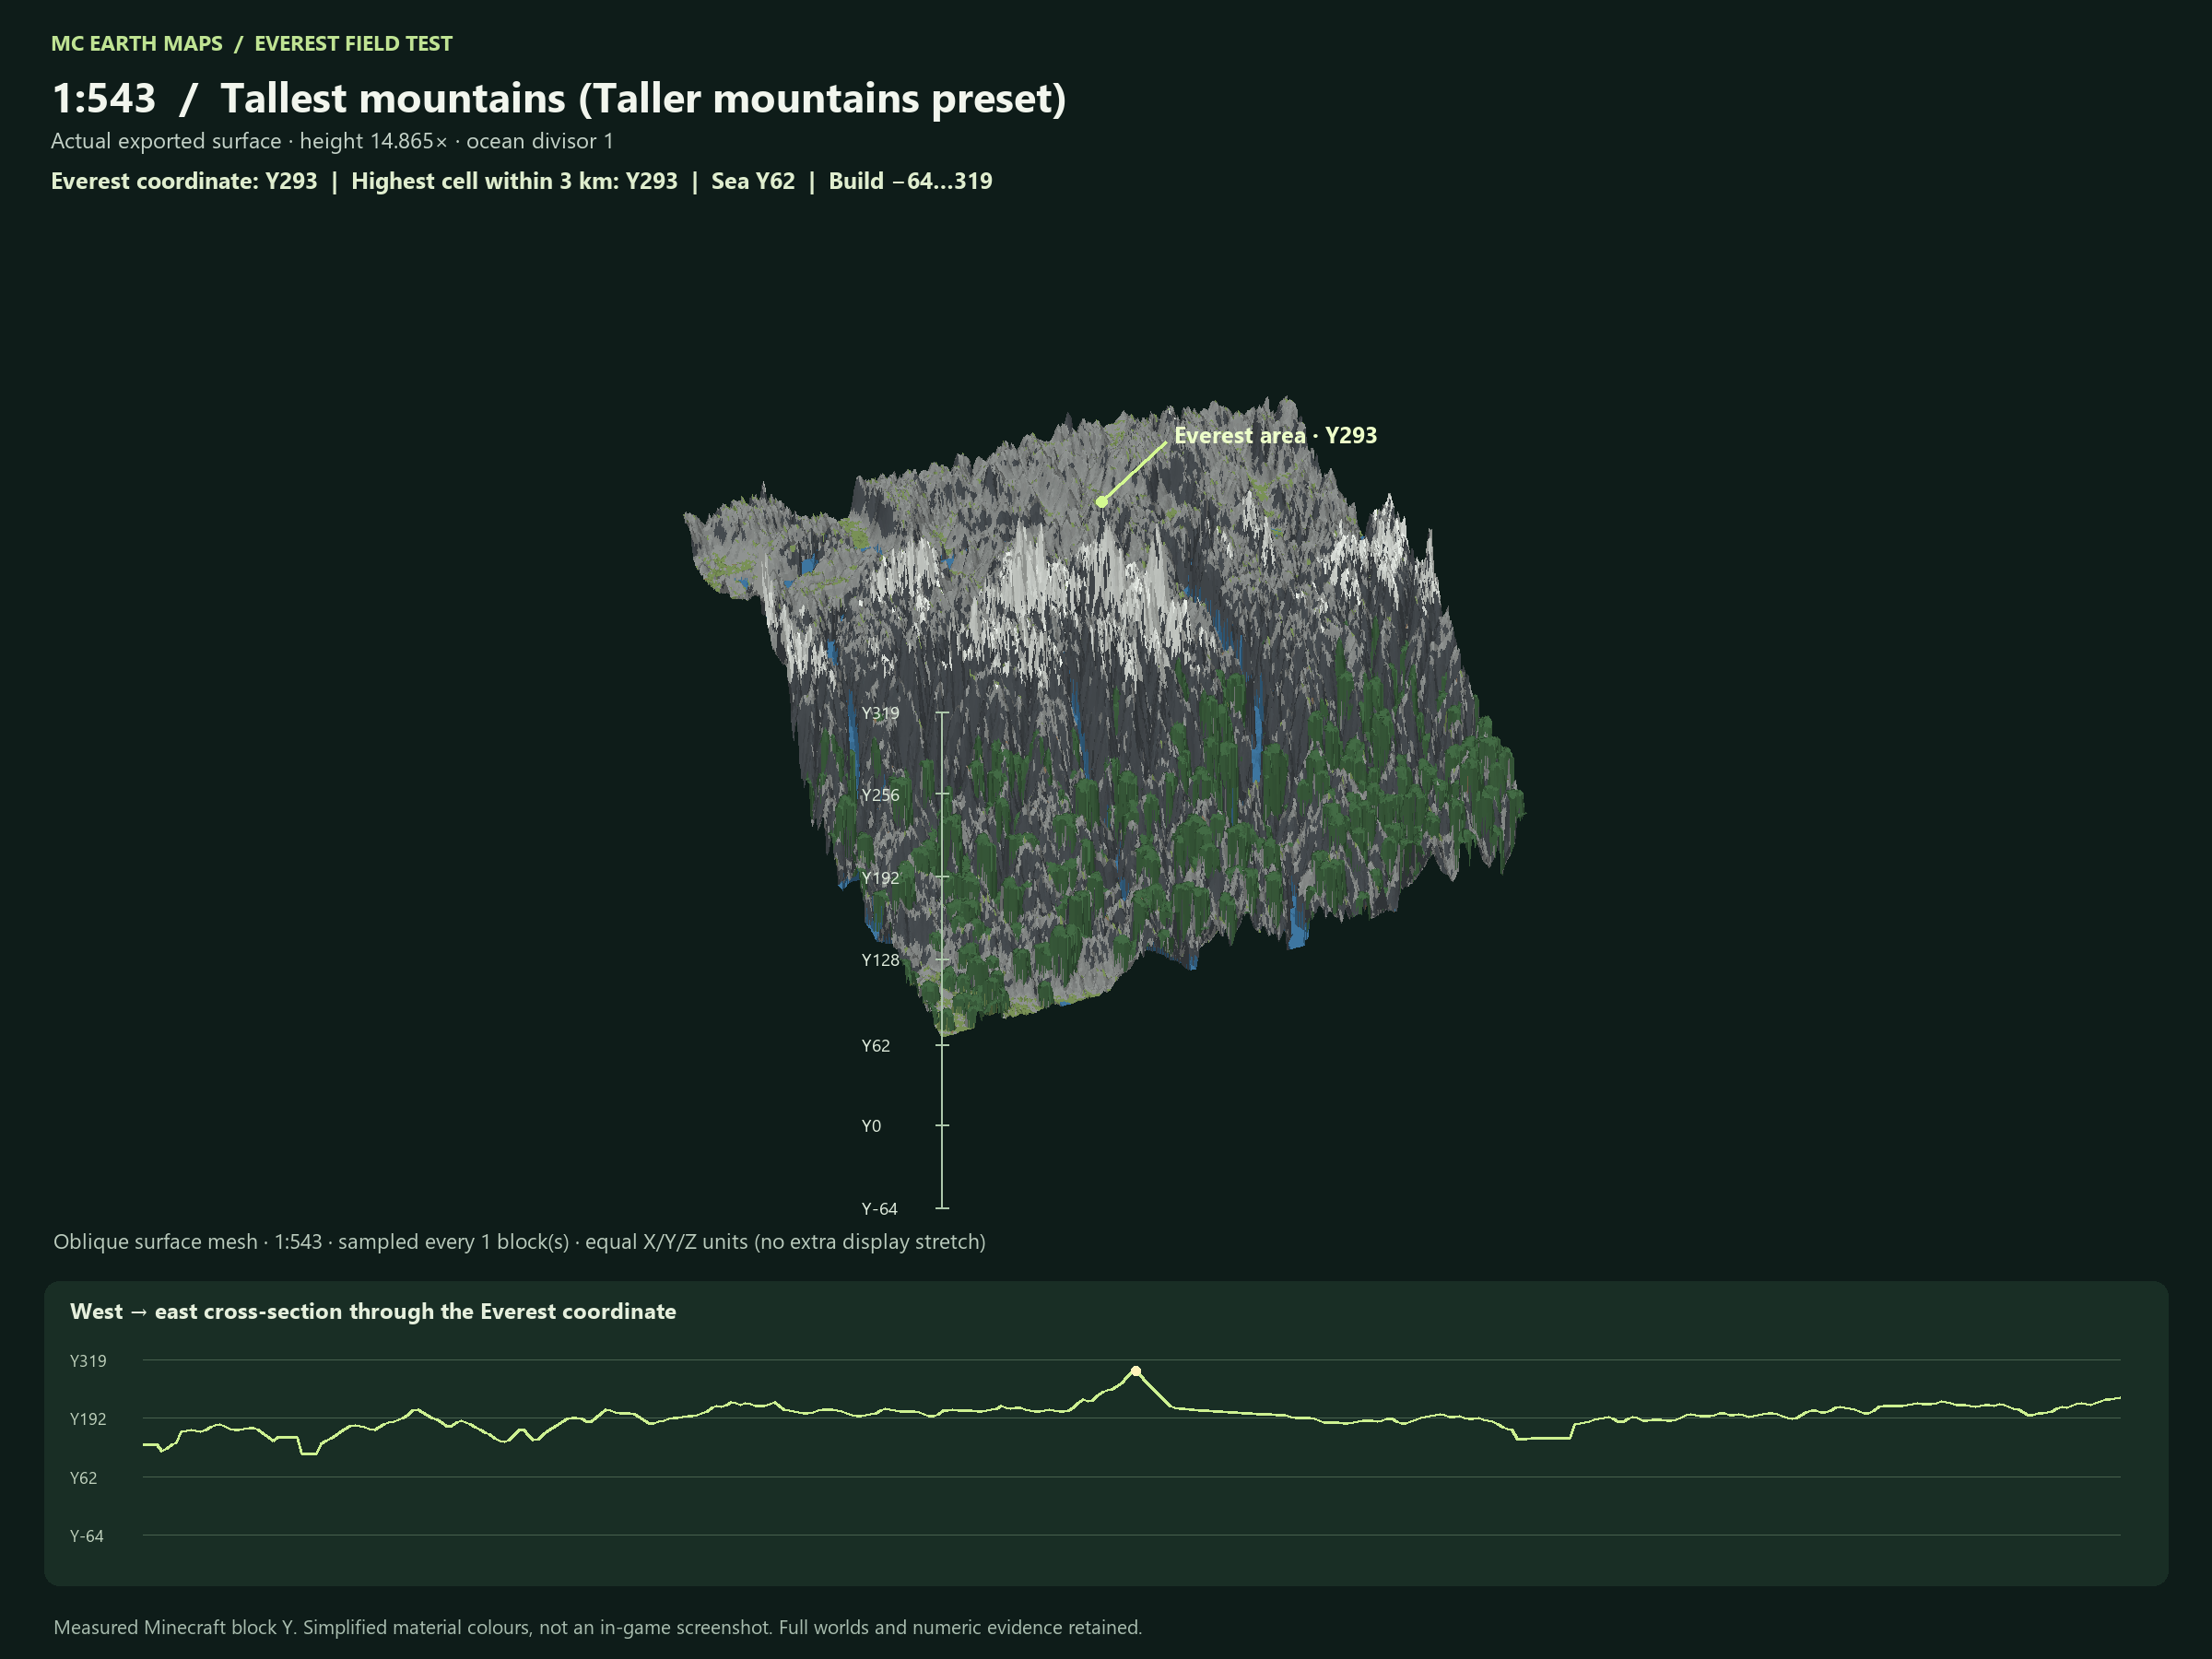
Same Himalayan selection, sea level Y62 and camera at four scales. These views come from finished Minecraft 26.2 blocks with simplified colours, not in-game screenshots. There is no extra display-only height stretch. Click any image to read its Y labels at full size.
| Scale | Balanced | Taller mountains |
|---|---|---|
| 1:217 | Y264 · 202 above sea | Y294 · 232 above sea |
| 1:326 | Y195 · 133 above sea | Y293 · 231 above sea |
| 1:543 | Y217 · 155 above sea | Y293 · 231 above sea |
| 1:1000 | Y145 · 83 above sea | Y228 · 166 above sea |
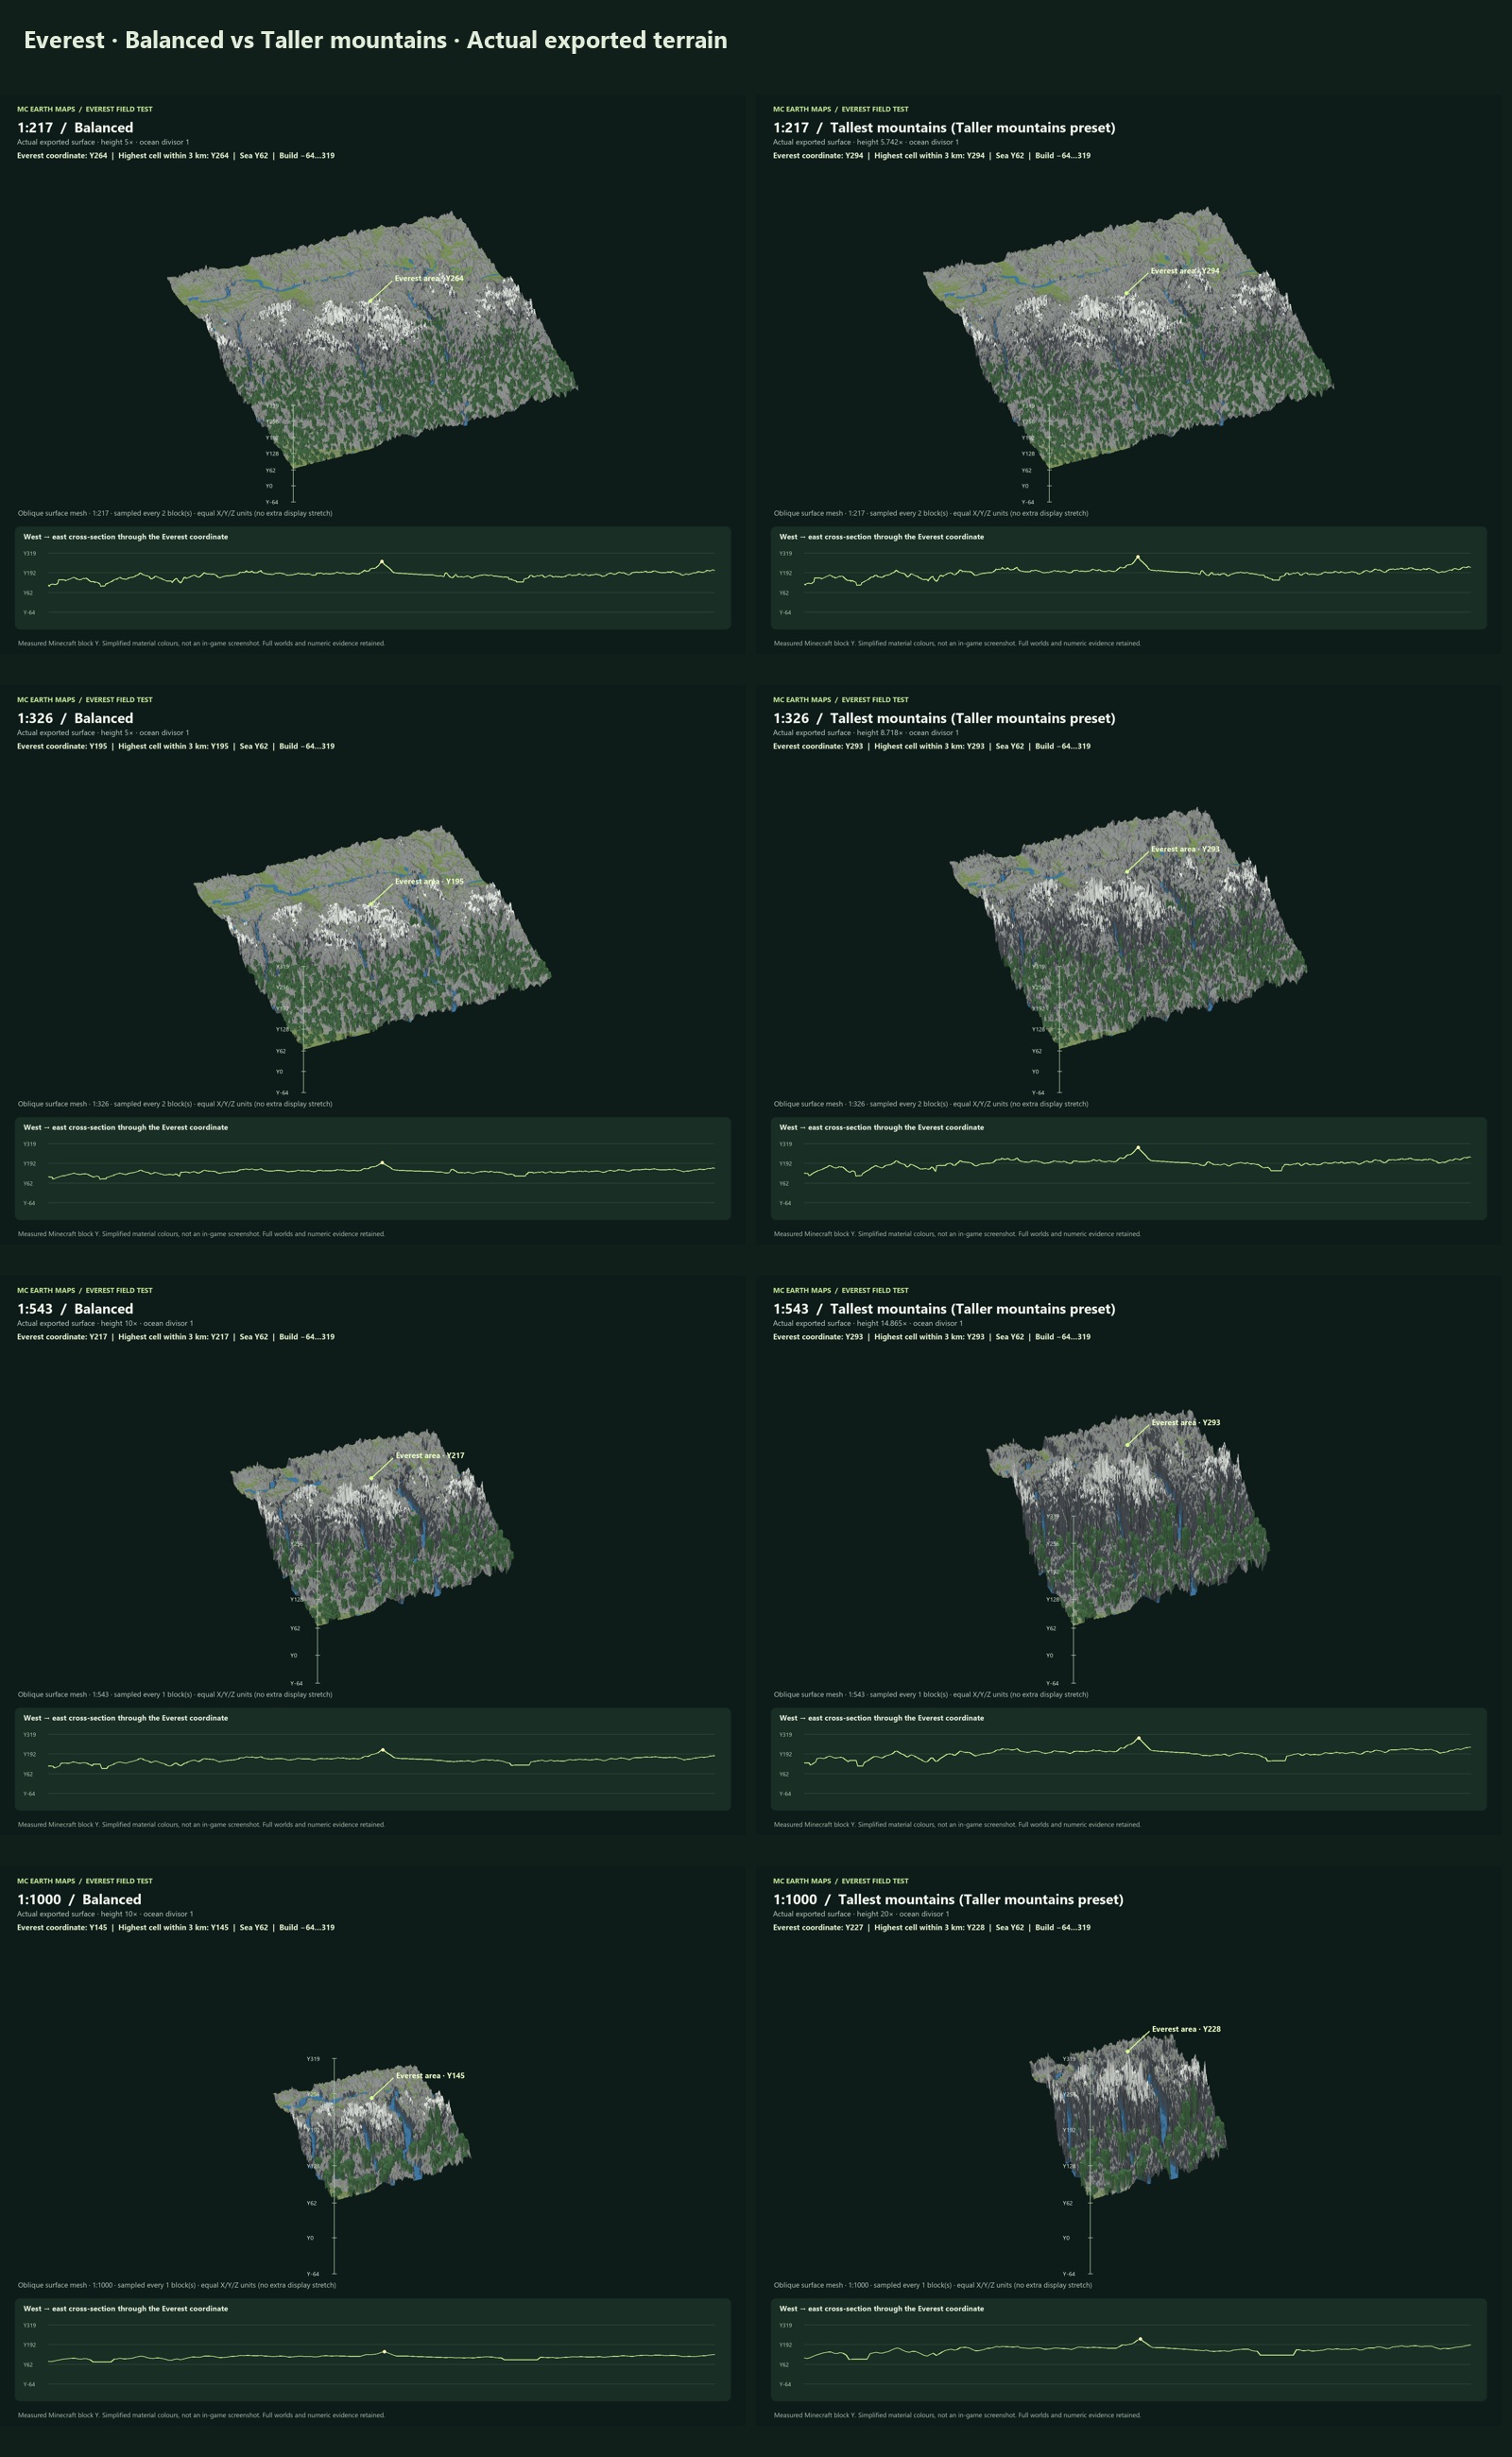
1:217 — compare both terrain modes
1:326 — compare both terrain modes
1:543 — compare both terrain modes
1:1000 — compare both terrain modes
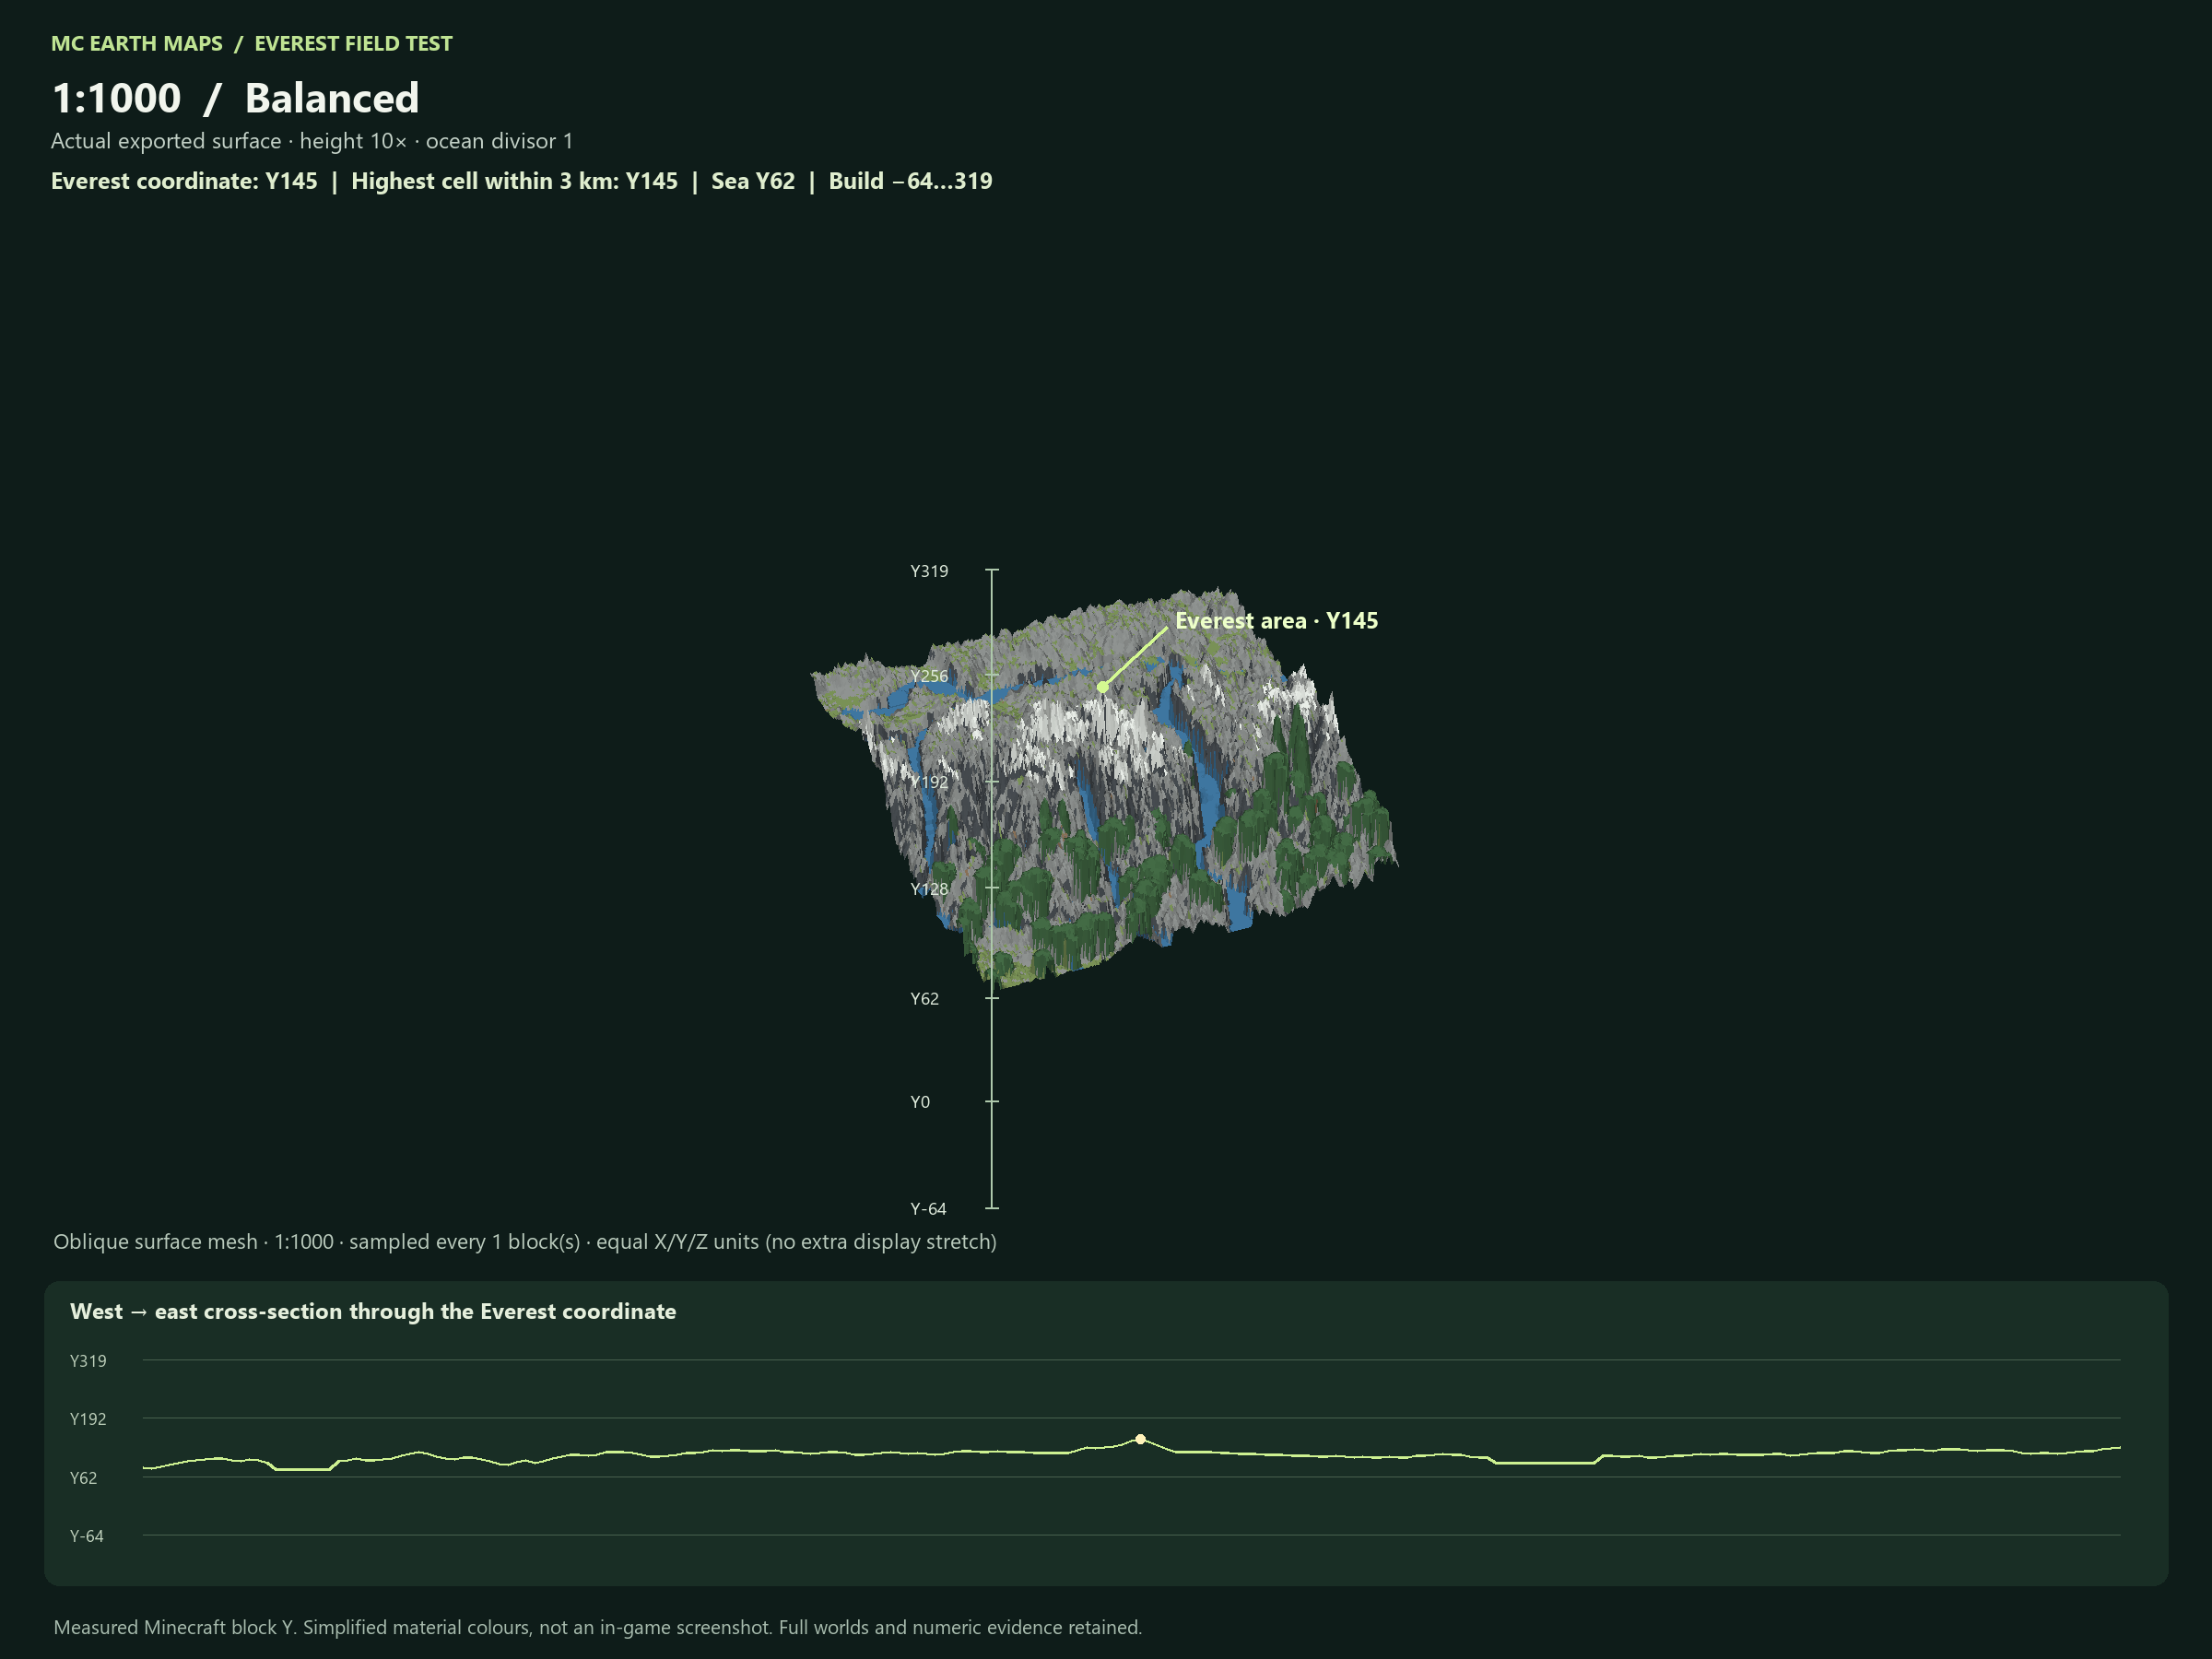
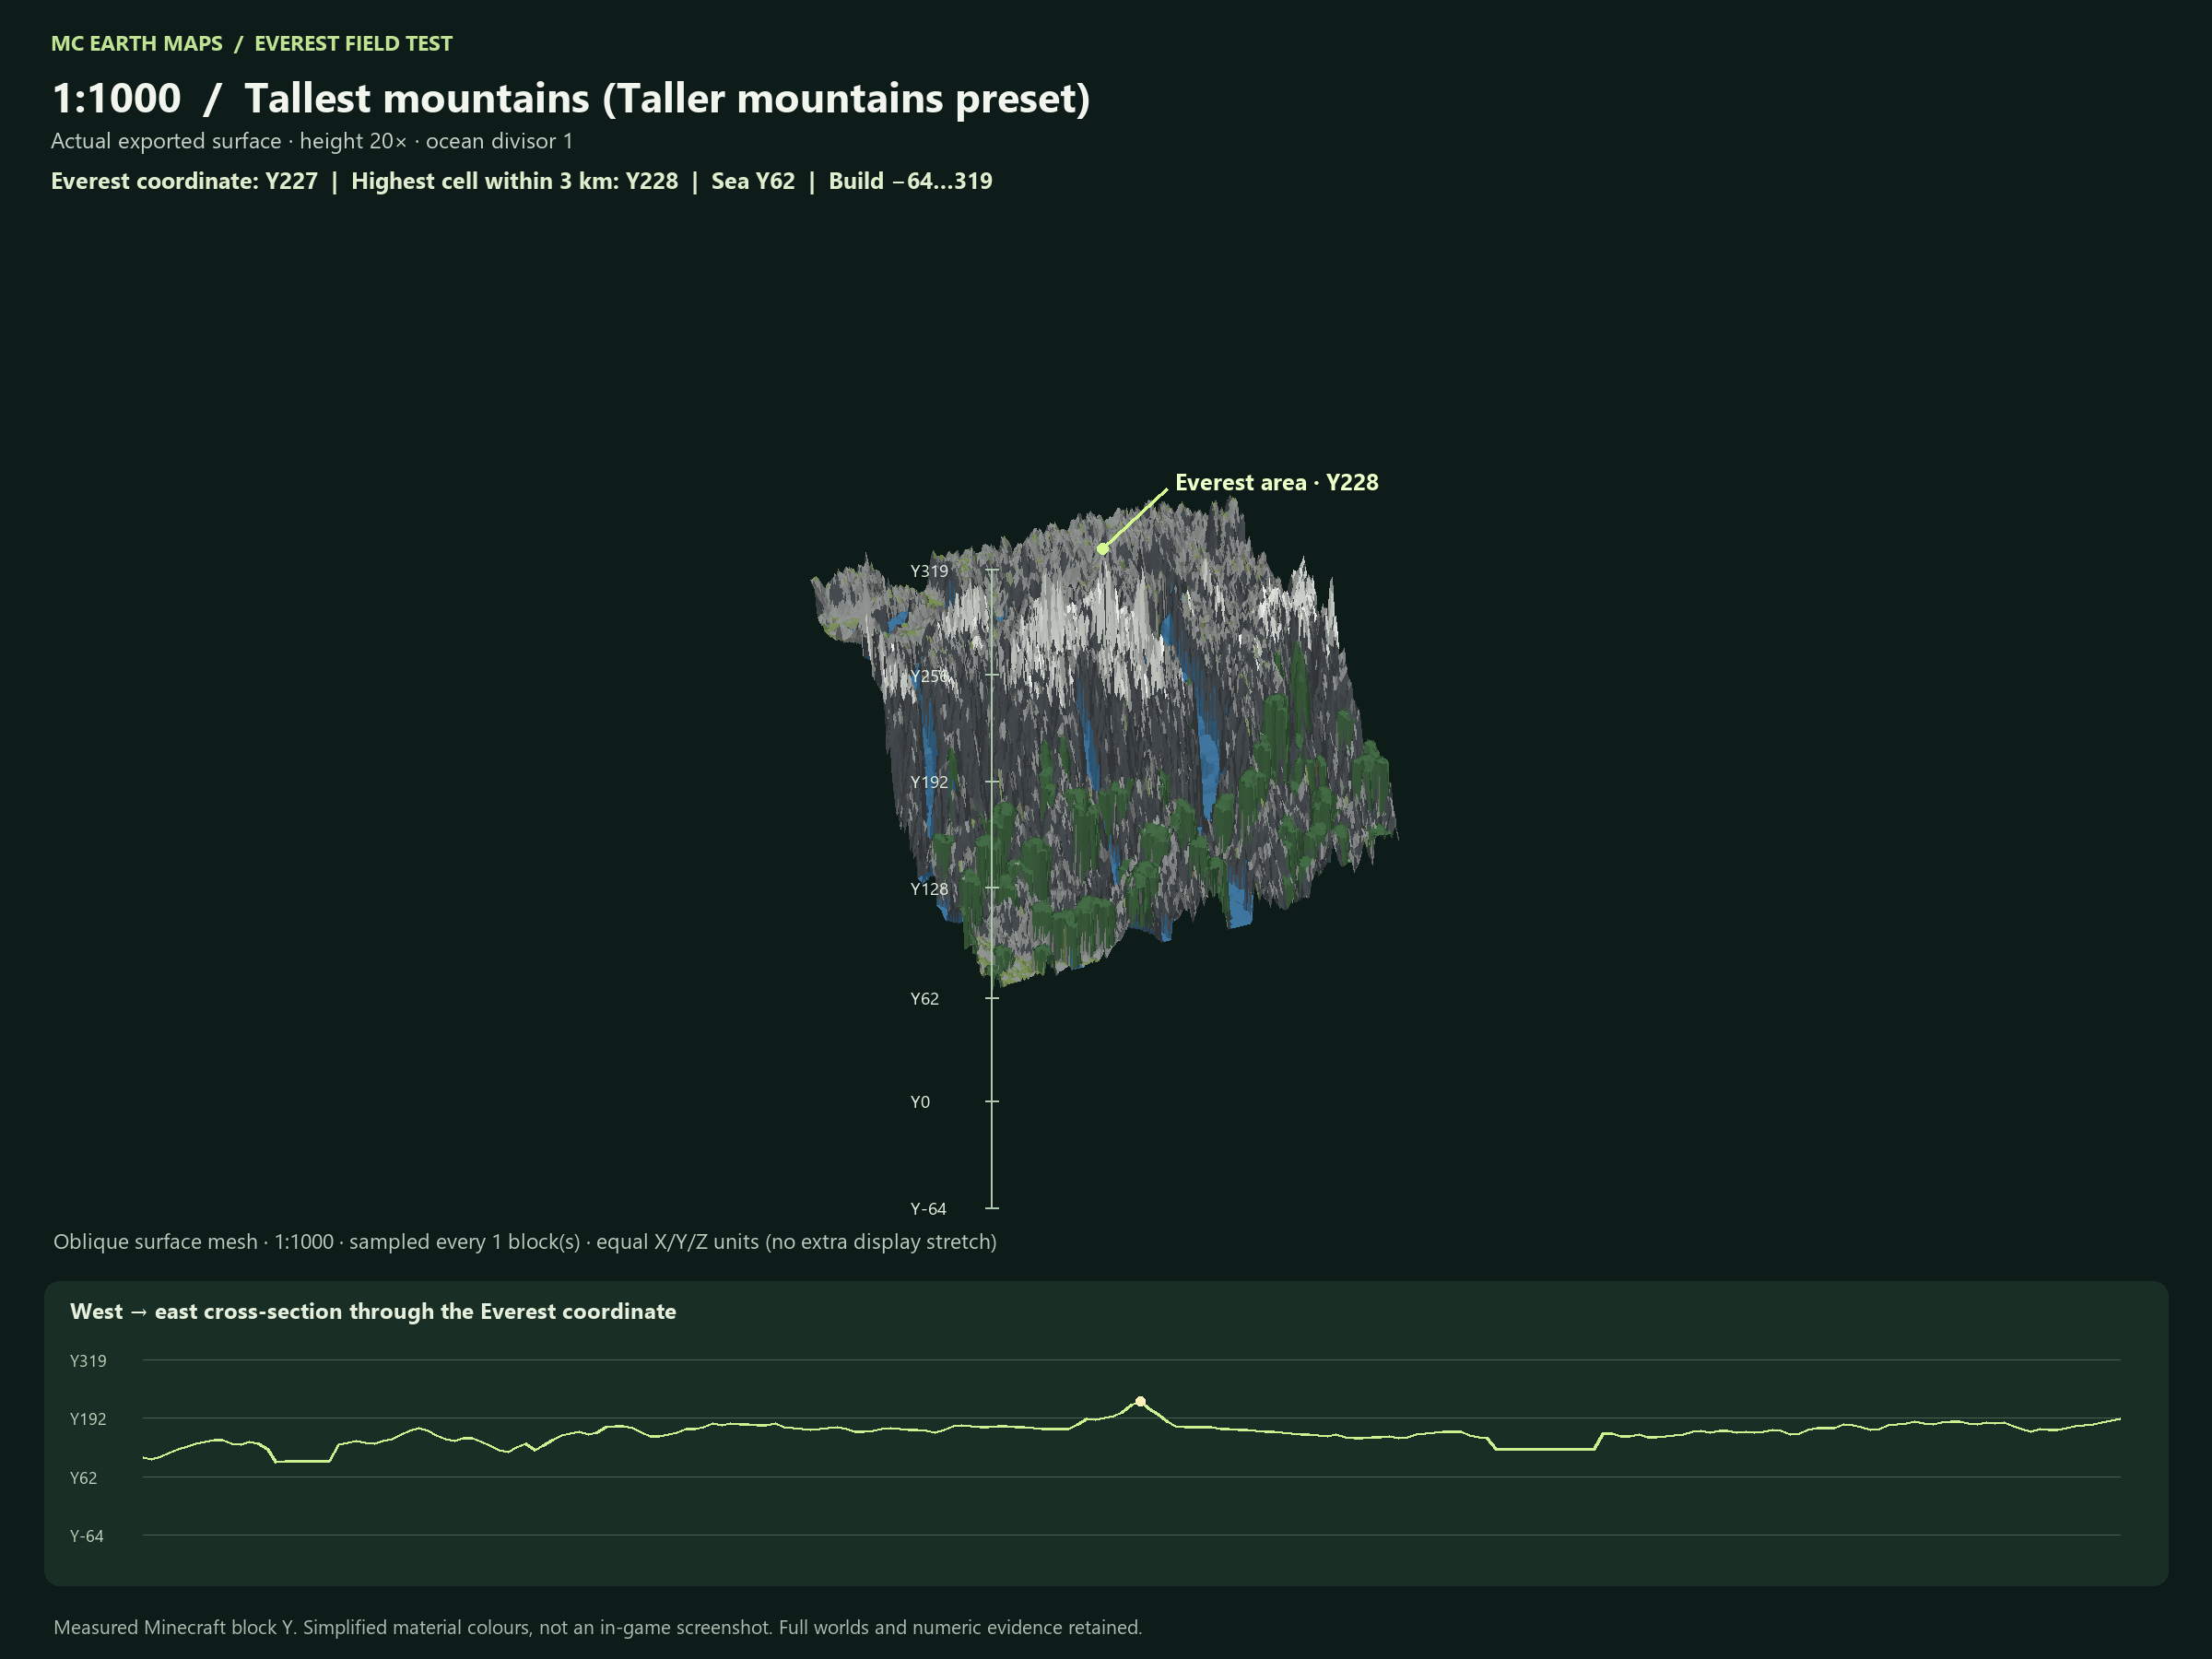
Selection: 26.95–28.95 N, 85.80–88.05 E. Resolution and neighbouring peaks affect measurements. These regional examples are not exact predictions for Full Earth or another selection. Balanced uses scale-specific presets, so heights do not decrease evenly between scales. These inland examples use ocean divisor 1 and do not test deep-ocean bathymetry.
Existing projects retain their saved settings; updating never rewrites an existing world. Use 1.0.6 workers for new fixed-height jobs and matching builds when splitting work. Keep the matching Terralith datapack or Biomes O’ Plenty installation when exporting those biome modes.
Use your worker fleet
Windows and Linux desktop applications can join as workers; Linux servers can use the headless installer instead. Start at worker setup, or choose a desktop download. Create a map under Maps and jobs and assign one worker or a compatible group sharing a destination. Job pages show batches, logs, previews, generation time and upload progress. Priority and membership changes take effect at safe batch boundaries; saved progress stays with the map.
New 1.0.8 map controls include seasonal lakes, softened river banks and steep-face tree avoidance. Hover or focus [i] for guidance. Update selected workers before using these settings. New maps share the desktop's geographic coordinates and can use the experimental global tree collection. Existing maps keep their original coordinate frame and engine build.
Make your first custom world
- Get the application. With lifetime access or an existing active subscription, download MC Earth Maps from your EarthMC account. Choose Windows MSI or the Linux GUI, then follow the instructions for that download. Existing Windows ZIP downloads remain available until the MSI release is ready.
- Sign in. Use the EarthMC account linked to your purchase. No separate WorldPainter installation is required.
- Choose an area and scale. Select a region, enter your custom scale ratio, and check the footprint estimate. Start with a small area before attempting a full-world generation.
- Shape your world. Review the World settings, including elevation, water depth, climate and detail. Save the project to preserve your settings.
- Choose an output folder. Use a location with enough free disk space. Keep it separate from a running Minecraft world.
- Generate and inspect. Let the job finish, then install the exported world in your Java edition saves or server folder. Keep your project so you can reopen the same settings later.
Custom scale is not unlimited capacity
At 1:543, one horizontal Minecraft block represents approximately 543 real-world meters. Smaller denominators produce larger, more detailed worlds. A full Earth at a detailed scale may require substantial resources. Available memory, disk space, data coverage and generation time limit what your computer can produce.
Lifetime access, offline use & updates
MC Earth Maps costs $49.99 USD once for lifetime access on your EarthMC account. There are no recurring payments for this purchase. Existing $15/month subscribers keep their plans until they upgrade or cancel; a successful lifetime purchase cancels their monthly plan without an additional charge or prorated refund. Verified access works offline for up to 24 hours. Reconnect for verification and geographical data. Generation uses your hardware; hosted compute is not included.
In 1.0.8, desktop updates ask for approval before downloading and installing. On Windows, the app offers the signed MSI; Linux uses its desktop update flow. You can defer installation until after closing. Finish active work first; settings, caches and saved worlds are retained. Linux worker updates are approved from the portal unless you have explicitly enabled idle automatic updates. Manage billing through your access & billing page.